Westfield Megabusa Build Diary
After the failed attempt at bending the fuel line yesterday, I went to Machine Mart first thing in the morning before starting work for the day and got hold of an automotive pipe bender (pictured below). It cost under £13 and looks like it will do the job nicely. I used it a couple of times on the scrap pipe which we damaged yesterday and it looks like it will work very well. Very tight, controlled bends, and the pipe cannot slip or rotate either. Excellent!
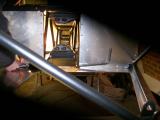
We began running the "send" pipe from the back of the chassis to the front. We went along marking with a pen, making 1 bend at a time, then re-fitting to check the next bend location. It's quite time consuming, but it's something you want to get right first time as your changes cannot be undone!
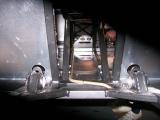
The pipe bender makes very light work of the bending and is especially good at making "S" shaped bends, where you need to drop the pipe down an inch (to clear the seat mounting holes for example). Eventually we had a shape we were happy with, and so we started drilling holes into the chassis, fitting P-clips around the pipe, and then riveting into place.
It quickly became apparent that all of the holes should be drilled BEFORE riveting the pipe into place other wise the drill-points become difficult to access, and it gets worse the more rivets you do as the pipe will be more reluctant to move.
The "send" line is now nicely in place, but we'll have to wait until Westfield send us a new pipe before we can run the "return" line. Luckily, we can move onto something else in the meantime as the fuel lines do not interfere with anything else at this stage.
Laurence
 |
 |