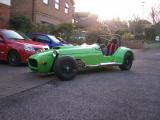
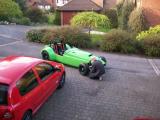
Matt came home last night and was pretty gutted that he missed the first outing, so decided he would drive it this evening instead.
He came home from work around 5:30, and we got the car straight out. It was beautiful weather, and Matt just couldn't wait to get in the car. We pushed it out of the garage, started it up, jumped in, and away we went.
We took the same route as before - sticking to only our road and the next which are both dead end roads, and see very limited traffic.
I warned Matt about the clutch, but immediately he stalled a few times. We found that the best thing to do is pull away with no throttle, which stops the clutch from snatching the revs and stalling.
Matt got the car going, then stalled again at the end of our road and blocked a car behind us as he wasn't sure if he was in neutral to start the engine again. We waved the car on, and then continued up the hill.
We got to the top of the hill, turned it round, and then started filming:
http://www.youtube.com/watch?v=_Kk900AzCnQ
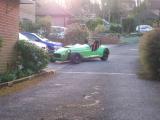
We got the car back, checked a couple of things, and then I decided that I wanted a go too - I just couldn't resist it. I went back and did the short route that Matt just did.
Here is the video: http://www.youtube.com/watch?v=XwDIYUFY13I
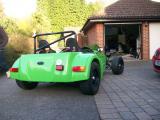
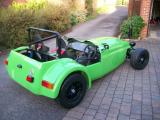
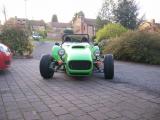
Matt wanted to get a couple of pictures of the car, so we took a couple and then Matt went out once more in the car. Whilst he was driving I noticed the DASH2 giving a engine temperature readout of 120c! I panicked and told Matt to get the car back to the garage as quick as possible and then turn off the engine.
Strangely enough, the cooling fan was turning on and off as it should do, and the fan is controlled by a thermostatic switch which opens at about 90c, so I must have wrongly configured the DASH2. I'll go over my settings and check.
Laurence
 |
 |
 |
 |
 |
 |
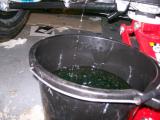
We haven't really done a great deal on the Busa for a few days, but I have been playing around with a fuel leak. Each time we walk into the garage there is a strong smell of fuel, and I spied where it was coming from earlier in the week.
I thought it was the hose that goes from the fuel tank outlet to the fuel pump, but instead it turned out to be the boss that threads into the tank. I had drained the tank and checked it out earlier in the week, and there was no O-ring fitted when it was assembled at the factory. I fitted on myself, but it's still leaking so Westfield asked for the tank back for examination.
It's not to difficult, but you do get very smelly when draining the tank as fuel gets everywhere. Once drained I removed the tank and looked at the boss and it will not go any tighter, so Westfield can have a look at it.
Laurence
 |
 |
 |
Now that the car has already run and bar a few niggles, seems roughly ok, it's a good time to start the SVA preparation.
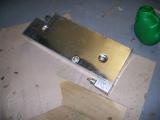
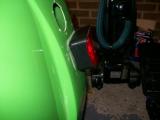
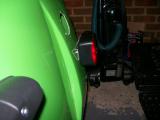
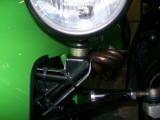
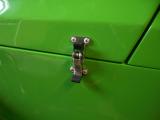
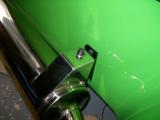
Number 1 on the list is the fog light angle. The fog light sits at a slight angle when flat to the bodywork, so I used the supplied plate from Westfield to make it sit square to the floor. This was very easy and just required the block connector to be dismantled so the cable could be run through the metal bracket. It looks terrible, but the light sits square and should be fine with the SVA examiner.
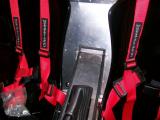
Next job was to the fit the handbrake cover as this is another requirement. There was a rubber matt which we couldn't work out as it made the whole assembly too much for a screw of rivet to go through, so we just left it out. Also, we used screws and not rivets since I'd like to be able to remove it if needed without awkward drilling.
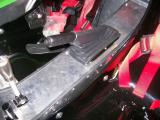
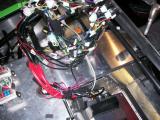
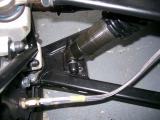
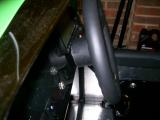
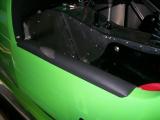
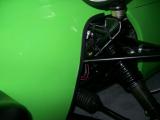
There are a lot of sharp edges in the cabin, so I covered everything I could with rubber u-channel. I got Westfield to send me loads and loads more as I wanted to go around everything, and still have enough spare to take to the SVA for last minute patching if needed.
The entire transmission tunnel panel was covered, and so were the reverse box inspection panels and the ECU tray. It actually looks really nice. Super glue holds it really well, and bolting it down holds it even better, so I used both which helped with positioning.
Lastly, I still wasn't happy with the aero-screen as it was too close to your hands when placed on the steering wheel. Your knuckles came into contact with the screen, and this is not a good idea. The screen needs to come up at a steeper angle.
I decided to fibreglass the holes up in the scuttle and start again. This time I made a much better job and the screen sits at a much better angle.
Laurence
 |
 |
 |
 |
 |
 |
 |
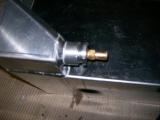
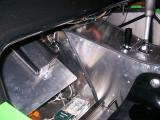
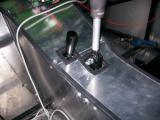
The new fuel tank arrived from Westfield today. The old one was leaking around the boss insert at the bottom of the tank in the swirl-pot-like section. I had already checked it to see if it was assembled correctly and the O ring was missing.
Even after adding one, it still leaked and when I tightened it it would no longer un-tighten. It was something that should have left the factory correctly so they agreed to send a new tank
After speaking with Gavin, apparently this boss should leave the factory with the thread covered in copper grease so the aluminium does not bind, and my next door neighbour had said that the reason that the boss would not come out was for the same reason a few days previous. Anyway, it's not a concern now since the new tank is here and there looks like there is plenty of copper grease on the thread.
I didn't trust the readings I was getting before from the tank level sender, so I decided to remove the fuel tank sender and check first of all, the resistance at full and empty by manually moving the arm, and secondly, the arm range of movement to ensure accuracy.
The VDO sender gives 3 ohms when empty, and 180 ohms when full. This gives me everything I need to scale the Dash2. I made a slight alteration to the arm length, and then re-assembled the tank.
I'm a bit of a pro at getting the tank in and out of the car now having done it on more than one occasion, so it didn't take me very long to put it back in the car and have it ready.
Laurence
 |
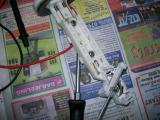 |
The speedo pickup normally fits at the rear of the car, but Westfield have had little success with the speedo sensor and the DASH2, so they have sent me another one with a bracket that fits at the front of the car. The bad news is that I have already secured my wiring and now I'll have to run this along the car too, but it's not the end of the world.
The sensor came with no instructions and 3 bare wires, so I had no idea what to do with it. I spoke to Mark at the factory and he told me that the wires just needed soldering into the speedo block connector on the dash loom. I could see it had worked because the sensor unit lights up orange when it sees a connection. I just had to adjust it to sit close to the hub bolts and then it was all done.
Laurence
 |
Over the last new days I have spent the odd hour here and there putting the finishing touches on the car. The main focus was the SVA preparation though.
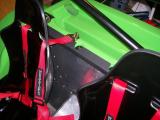
It seems that there are no right or wrong answers with the SVA trimming. Just make sure all of the sharp edges are covered. Westfield ended up sending around 4 times as much rubber trim as they did originally since we had to go around the seats, up the transmission tunnel, around the nosecone, and along several other places just to be sure.
They also sent us a load more plastic nut and bolt covers. I wanted to make sure I covered everything, and have enough to take to the SVA for safety too. The same story for the rubber trim too.
See pictures for the areas that were given attention, but in short they were:
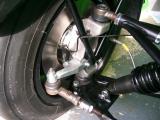
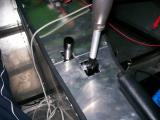
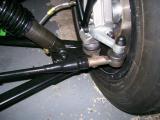
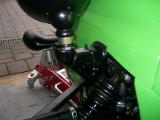
- Cover all exposed nuts and bolts inside cabin (ie. gear lever), and all wishbones and front end bolts.
- Trim sharp edges of transmission tunnel.
- Trim reverse box inspection panels.
- Trim holes cut for gear and reverse levers.
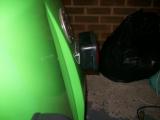
- Fit spacer for headlights to ensure no wheel contact on full lock.
- Fit headlight bracket covers.
- Fit kick strips and rear bulkhead/bootbox front cover trim plate.
- Space foglight so it's 90deg from floor.
- Cover rollbar brackets (decided not to fit rollbar supports until after SVA for easy boot box access).
- Fit steering wheel boss cover.
I'm sure there were some other bits too, but my suggestion is this - if you think it might need to be covered then cover it!
The car seems totally ready for its SVA now. I had to raise the front suspension up a little bit to ensure the indicators were above the minimum height from the road. The only other problem was self centering of the steering, so Matt and I popped up and down our road quickly. This is not strictly legal, but at very low speeds in a dead-end private road is not quite the same as popping down to Tesco in an uninsured car. I know the law is the law, and where do you draw the line to what you should and shouldn't do etc...
Anyway, there is no self centering at all, and the R888's don't help as they are so sticky. I added some extra toe-out and altered the tyre pressures and it at least attempts to self-centre now. Hopefully Mr SVA man will be ok. We might have to make some alterations on the day.
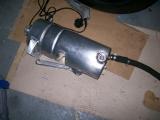
After we had been up the road and back a couple of times, the oil obviously gets thinner and it was leaking from the bottom of the dry sump tank. Only very slightly, but it's obvious it shouldn't do it. It looks like a very similar problem to the fuel tank boss leak. I removed the oil tank it to check what's wrong.
Also the last pic was a storm on its way over and it turned the sky an awesome colour, so I pictured it.
Laurence
 |
 |
 |
 |
 |
 |
 |
 |
 |
 |
 |
 |
 |
 |
 |
 |