Westfield Megabusa Build Diary
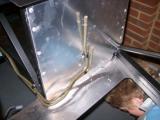
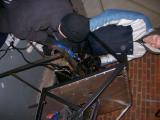
Tonight we had to back-pedal slightly to do some older jobs which didn't get finished, and then carry on with the wiring loom. The first job was to run the return fuel pipe. We damaged the first pipe by trying to bend the pipe without a pipe bender. DO NOT ATTEMPT THIS as you'll flatten the pipe. Westfield sent a replacement pipe yesterday, so we got to work on it first as you need to take your time with it.
We made the first couple of bends and then tried it on for size. We found that the more times you offer it to the car and then remove it to bend, the better it turns out. Once it's shaped, drill all of the holes before riveting any of the P-clips to avoid drilling through the pipe by mistake.
The pipe was not our best work, but looks good enough to not move, or foul any of the moving parts (I hope).
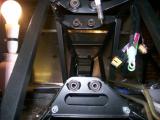
The next job was to fit the clutch master cylinder reservoir. There are 2 pre-drilled holes on the frame, but DO NOT use these as a) they are too big for a 4.1 rivet, and b) they are for the gear shift linkage. We riveted the bracket into place, and then screwed the reservoir into place. Westfield still have a few bits to send us, and one of them is the rubber pipe which sends the fluid to the clutch master cylinder.
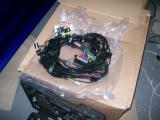
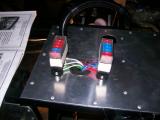
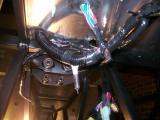
The last job of the evening was to finish the wiring loom. We got as far as feeding the fuse box wires through the scuttle panel, then found that the screws we needed (M5x25mm) were missing, but Westfield have now sent them. The loom must be separated into front and rear, then you can begin fastening the loom to the chassis.
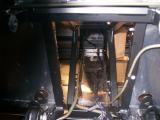
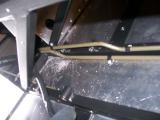
The only complicated bit was working out how to fix the loom to the underside of the transmission tunnel when a drill was nowhere close to fitting in the gap. Eventually we decided to drill from the top through both sides of the chassis rail. This forms a straight and neat hole at the bottom, and the hole at the top of the rail will just get covered up by the panel and the trimming.
We followed the guide and fixed the loom all the way to the rear, but we have left off the last few loom fixings until the diff is in place, since the ATB diff we opted for is different to the one pictured. When we can see how it fits we'll decide the best route for the last 2 feet of the loom to follow.
Fingers crossed the diff and reverse box will be here by the end of the week...
Matt
 |
 |
 |
 |
 |
 |
 |
 |
 |
 |