Westfield Megabusa Build Diary
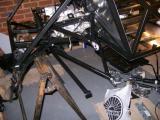
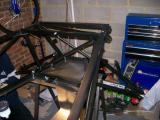
I had decided not to work between Christmas and New Year and set aside most of the time for working on the car. Today's job would be fitting suspension and wishbones. We were both looking forward to this, as up until now it didn't look like much had happened to the car, but after today it would look like a car instead of a bathtub.
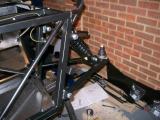
I started on the rear section first. Lots of copper grease on all of the threads and moving parts and then the top and bottom wishbones can be bolted into position. The entire setup should only be finger tight until the car is finished (to aid the geo setup I presume). Many visitors have since commented on "That bolt not being tight!" :)
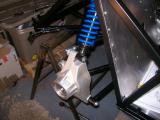
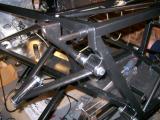
After getting both sets of wishbones on, and then realising that the uprights would not fit, I realised that I had fitted the lower wishbones upside down, so off they came, and they were refitted the correct way and everything lines up beautifully. I had to enlarge one of the holes in the rear bulkhead panel to get full access to a bolt, but other than this it's very straightforward.
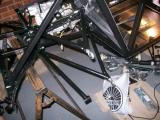
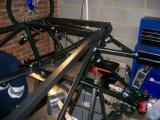
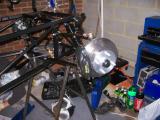
It was now time to fit the suspension dampers. We were supplied with 2 pairs of front suspension - one with blue springs, one with black. After an hour of looking on the web for the difference and finding nothing, I decided to "get technical" and compress the dampers to see which was fitted with a higher spring rate. The black springs were much harder than the blue, so they must be the front units. I then looked through the item list and it listed "shock absorber std front", and then "shock absorber bike front" so I am happy that both front and rear dampers are "front" units on this kit. Further down the parts list I see "SPRING 7x200x2 BUS/NTR FR BLK" so I am happy that the black set go on the front.
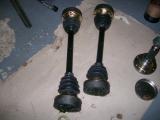
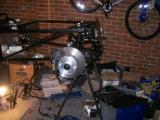
With these bolted the next job is to fit the driveshafts, but we quickly run into a problem. The nearside stubshaft does not fit through the hub. We have given it to a friend to see what they think, and he has agreed that there is something wrong with it - the splined shaft seems to be the wrong size! The offside unit fits just fine, but we can't fit it tinto place because the driveshaft bolts are missing from the kit. We'll ring Westfield when they are back from their Christmas break on the 2nd January.
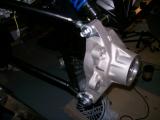
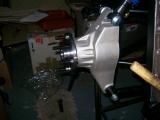
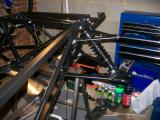
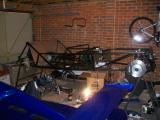
It's now time to fit the front suspension to the car. More copper greasing, and the front wishbones can be fitted and the dampers bolted into place. We decided at this point to fit the front brakes as the AP's take up a box by themselves and it would be good to get rid of it, so the ball joints were fitted into place. We had to get some extra bolts as the size stated for the lower ball joint will not fit the Megabusa chassis. Once they were bolted down we fitted the front uprights, discs, and calipers - again, finger tight for now.
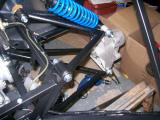
With the shock absorbers bolted into place it looks much more like a car. However, from this stage you should watch your head when under the car it's very easy to whack your head on a disc when standing up. You'll see what I mean!
Laurence
 |
 |
 |
 |
 |
 |
 |
 |
 |
 |
 |
 |
 |
 |
 |
 |