Westfield Megabusa Build Diary
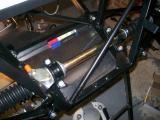
Today I set to work fixing the steering rack into place since we couldn't fit the rear brakes until the drive shaft bolts were sent. Following the SEi manual, I fitted the rubber mountings to the rack. I didn't have any silicon lubricant, so I used a bit of washing up liquid as rubber does not object to this. With the washing up liquid and a rubber mallet, the metal clamps fitted over very easily. I bolted these down and then span the track rod ends into the shaft.
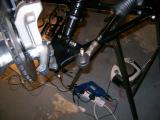
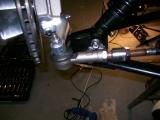
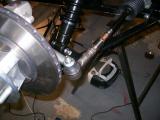
When I fixed the track rod ends to the steering arms on the uprights I knew something was wrong. Both wheels were pointing inwards and then I remembered that we has specified the wider front track option. This means the front wheels are further apart from each other, and then steering rack was not wide enough. I was thinking that Westfield had sent the wrong rack, but were closed for a couple of weeks so I couldn't ring them. I returned to the house quite annoyed, and then though there was no way that Westfield would develop an entirely new steering rack for this upgrade, so I began looking around for something that would extend the steering rack, and I found them almost immediately. Without instructions, I fitted them along with a nut each side, and it seems right. The steering is still not straight, but we can fully adjust the tracking once the car is ready to be driven, and do the camber adjustments at the same time.
The last job today is the front propshaft, which connects the drive from the engine to the front of the reverse box. Looking at the torque values for these nuts, I realise they must be thread-locked too which I didn't do for the other bolts, so I decide to go back and do each of the other bolts at the other end of the reverse box, and also the rear diff too. In addition, I fitted a spring washer to each as a double precaution. You will reach a point where the torque you apply will spin the propshaft instead of torquing the bolt. At this point you should stick a screwdriver into the propshaft joint. When the screwdriver meets the chassis it will wedge and allow you to torque the bolt.
I marked each of the bolts with a line so we can see if they move at all, but I doubt they will. The only thing to worry about is if the tensile strength is high enough, but I think the driveshaft bolts will be the only ones to possibly worry about as they are situated after the 3.3 final drive and not before it.
Laurence
 |
 |
 |
 |
 |