Westfield Megabusa Build Diary
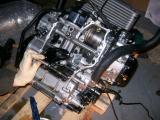
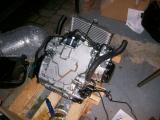
It's New Year's day, most of the alcohol has gone (along with the headache), it's the evening time, Westfield are still shut for the Christmas period, and we're running out of things to do with the lack of driveshaft on one side, so we decide that now would be a good time to tackle the dry sump system. Up until now, then engine has lived in a plastic crate on a pallet straight from Yorkshire Engines, so we lift it out. The box weighs a tonne so I was really not looking forward to this, but once we took the exhaust manifold, ECU, wiring loom, fuel pump, and all of the other odds and ends out of the box, it felt a lot lighter.
In fact, once we had a decent grip on it, Matt and I could comfortably lift it out of the box and on to the pallet. No engine hoist needed here! We had a box full of the dry sump kit, and a set of instructions that were faxed to Matt and really weren't that clear at all as a result - this could be interesting!
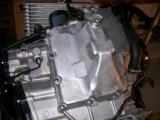
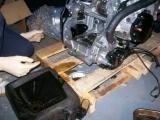
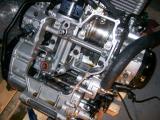
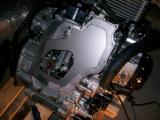
We tilted the engine over being careful not to crush anything, and then took the sump off. The engine is virtually new at 800 miles old (we opted for one that was literally run in instead of brand new so we wouldn't have to run it in ourselves). Due to the young age of the engine, the bolts came off like they were brand new.
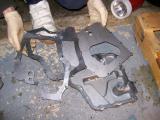
After 14 or so bolts were removed the sump literally fell off exposing a very healthy looking inside. The dry sump is much more shallow that the original, so you need to remove the original oil pickup and discard it, and then you need to remove the oil return feed and shorten it so the new sump can be fitted. Stupidly as I was refitting the pipe I dropped the bolt into the gearbox and sent myself into a state of panic thinking I'd never find it. I got my magnetic retrieval tool and found it almost immediately though - phew!
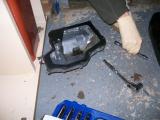
The new sump could now be fitted to the engine. Westfield supply 2 new sump gaskets and a baffle within the kit, as well as new sump bolts to replace the original bolts. The order is gasket on to bottom of engine, then baffle, then another gasket, and then the sump itself. This seals the baffle and the sump itself. You then just fix it back into place using the new bolts and spring washers. The next job is to fit the oil pump, but that's probably a job for another evening as it's cold and I'm hungry.
Laurence
 |
 |
 |
 |
 |
 |
 |
 |