Westfield Megabusa Build Diary
I had looked at the seats many times, and just got confused by the parts and fixings. This is another area that is left completely up to your imagination, as it's not in either manual. I spoke to Mark at the factory about them, and I have a pretty good idea what to do.
It was a bit of a gray area, so I'll explain how you do it here.
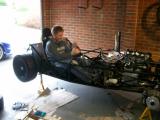
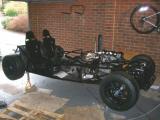
The first step is to fix the runners to the sub frames. Although the sliders are present, you still have options on how far forward or back the seats can be fitted, so you slide a few inches forward and back of a base location. Matt and I are both just over 6ft, so we decided that the base location should be as far back as possible, so we used the forward-most holes on the sub frame as our fixing points.
You also need to poke a bolt through each of the seat sliders. There is a stud at the rear of each slider, so you need to fit the bolt at the front of each.
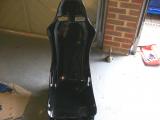
The seat can now be placed into the sub frame. My pictures don't make it very clear, but the front of the sub frame higher than the rear, so when the seat is placed in the frame, is is automatically rocked backwards slightly. Place the sub frame on the floor and sit in the seat to make sure the seat is squashed fully into place. We did this, and when we were happy, you drill the front seat holes. The holes are already present in the frame, so you just need to follow them through into the seat with a drill.
Once we did this, we bolted the front of the seats to the frame. You use a large dome washer which has a nice recess for the countersunk bolt on the inside of the seat so the bolt doesn't poke into you.
The sequence is (from inside of the seat outwards): countersunk bolt, large dome washer, seat, sub frame, small washer, nut. Now the front of the seat is fixed, but the rear has movement, so you can adjust how steep the seat is.
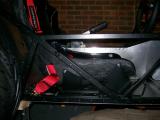
To do this, fit the seat into the car. You will need to drill through the aluminium in the car - you'll see exactly where as the holes are already there on the seat mounting points. Just make sure you drill through the correct holes, as there are more than one set. On out chassis it was the inner set of holes.
With the seat sitting in place, jump in the seat and make sure you are happy with the angle. You can adjust it by placing bits of wood between the seat and the sub frame to raise it, but we were happy with how the seat fits when resting at the bottom of the frame - it gave us the perfect angle. We removed the seats from the car, drilled the rear holes into the seats, and then fastened in exactly the same way as above.
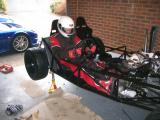
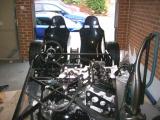
Finally, we re-fitted the seats and bolted them into the car. You will need to use a large washer under each bolt so it rests between the bolt, and the underside of the floor-pan. To tighten the front bolts you will need to slide the seat back and put an Allen key into the bolt to stop it spinning.
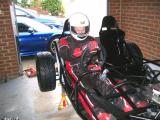
This was even more exciting than the engine going in, because we could finally sit in our car and visualise it. Matt got a bit carried away with it all though - see photos!
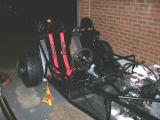
Last job is to fit the harnesses into position. We have 2 sets of harnesses, but only one fixing kit, so we'll have to call Westfield about the missing kit. Anyway, the bottom of the harnesses bolt into the side of the frame using the supplied bolt, a washer, and a locking serrated washer. The tops just clip into eye bolts which must be fitted just behind the headrests with the supplied spacer.
Laurence
 |
 |
 |
 |
 |
 |
 |
 |
 |
 |