Westfield Megabusa Build Diary
Wednesday is normally a night when Matt and I go out with our mates for a beer and a catch-up, but it has become an unofficial car night. It's ok though because the mates we would normally meet come round to help us instead of drinking beer, so we're not social outcasts after all.
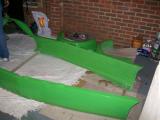
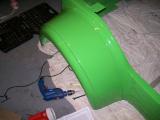
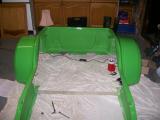
Kriss was looking forward to the body preparation and really wanted to be involved, so he and Jonny got round about 7:30pm and we started work. We went and got the main body panel from the greenhouse where it had sat under covers since collection, and Matt retrieved the rear arches from the loft. We moved the Noble, and sat the bodywork down in a nice big space next to the car on a blanket for protection.
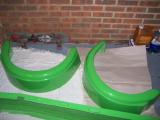
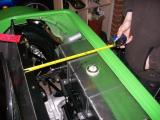
We rubbed the arch locating blocks down removing any rough edges to ensure a flush fit, and then Jonny and I set about bolting the arches to the main body section. We G-clamped each arch in 3 places, then marked the 10 holes we were going to drill. It quite weird, but the drill literally gets pulled through the plastic once the hole is drilled, and you really have to be ready for it!
Whilst we were doing this, Matt and Kriss removed the manifold from the engine so the body panel could sit in place once all of the preparation had been done. It didn't take long before both arches were firmly fitted to the body. The fit is generally good, although the gaps at the bottom of the arches is a little bigger than the rest. Nothing to worry about though.
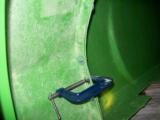
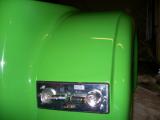
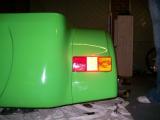
Now the rear lights could be fitted to the body - indicators pointing outwards. I was glad Kriss was here for this, because he has a good eye for lining things up, and although the lights already have mounting points, there is still plenty of room to get things wrong, and once you have drilled...
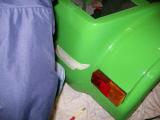
We decided on a final location, then removed the light and drilled a hole in the centre for the wires to route through. We then held the light back in position and drilled the 4 holes using the bracket as a template - this way the 4 holes will ALWAYS line up (even if they are not straight).
The lights look good, so we secure the brackets into place (using a p-clip on one bolt to secure the wires) and then fit the light cover. The lights look terrible as units, and we might well upgrade them to the rounded type. They fit nicely though.
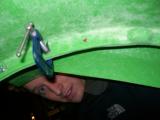
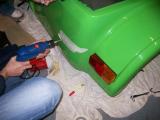
Now the fog light can be fitted, but it has no actual mounting point, so we have to be very careful with its position. It looks really easy, but we were very careful with the measurements and the whole process took most of the night.
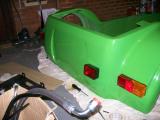
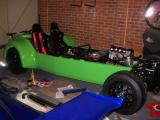
Jonny and Kriss were a big help with it, and as a last team effort before they have to leave, we picked up the body and placed it onto the chassis, stand back, and admire! The colour looks fantastic, and so does the car. We stop for a bit, feeling very happy with our achievements so far.
Matt and I carried on for a bit, and made sure the body was correctly aligned. We then looked at the roll-bar but decided it was pointless fitting it as we already had the mounting points for the RAC roll bar, so we just put it back down and decided we'd order the RAC the next day. A great night's work on the car which left all of us feeling very happy.
Laurence
 |
 |
 |
 |
 |
 |
 |
 |
 |
 |
 |
 |
 |
 |
 |
 |
 |