Westfield Megabusa Build Diary
Tonight Matt and I had a few loose ends to tackle. Connecting the engine output flange to the prop shaft, fitting the radiator expansion tank (header tank), fitting the dry sump oil tank, and fitting the fuel pressure regulator.
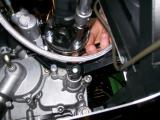
The first task is definitely a 2 person job. I laid on the floor with the torque wrench whilst Matt held a spanner on the other end of the bolts. We tightened them all, and then one by one we loosened a nut and bolt, applied thread lock, then re-tightened and torqued them. To stop the prop spinning we put the engine in gear each time to lock it. Once all 4 were tightened we marked each one so we could check for movement over time.
Whilst we were there we fixed the clutch line onto the slave cylinder.
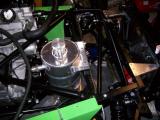
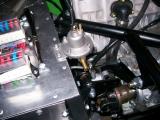
The oil tank fits really nicely. It has a right angle bracket at the bottom which fits perfectly over the frame rail at the bottom and it holds really well. Now you just hold it straight and drill through the top bracket and then all the way through the chassis rail. With this done you can just bolt it down with some M6 bolts and washers. We moved it as far over to the offside wheel as we could to allow room for the battery tray. The tank bracket covers the last letter of the chassis number etched into the frame rail. Hopefully this is not an issue though as the number is duplicated on the identification plaque.
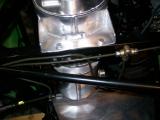
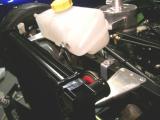
Now for a job I had looked at several times and just given up on - the expansion tank. Simon from the factory had send me some pictures to help me out. The fat tube points to the rear of the car, and the header tank fits on using the two plastic mounting brackets on the tank itself. It bolts to the same chassis rail that the horn is fitted to.
The flat bracket bolts to the rail so you just drill straight through both sides and fix into place. The second bracket comes off at a 45 degree angle to the car, so you have to mount it to the chassis using the supplied black bracket. It fixes underneath the chassis rail, and then you bolt it to the 45 degree bracket coming off the tank. This now feels nice and secure.
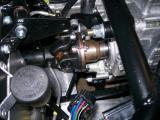
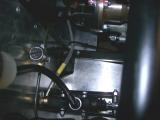
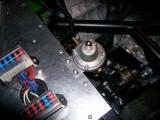
The fuel pressure regulator is another item which is left completely out of the manual, but it fixes to the chassis bulkhead rail. There were a few options for fitting, but I chose to use self tapping screws and locking washers as they were supplied with the kit.
The inlet sat very close to the gear change quadrant, but by the look of the unit, the inlet can be on either side, so I removed it and fitted it to the other side and swapped the blanking plug over too. These were on very tight and there was evidence of some thread seal, so I used thread seal when re-fitting both the nipple and the blanking plug.
I looked at the battery tray, drilled a couple of holes, and then realised that the tray's securing strap was missing, so I called it a night there.
Laurence
 |
 |
 |
 |
 |
 |
 |
 |
 |
 |
 |