Westfield Megabusa Build Diary
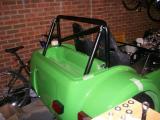
Tonight Matt and I both had the evening to work on the car. I wanted to get the coolant plumbing done, and Matt wanted to get the roll bar fitted, so we worked at opposite ends of the car and helped each other when required.
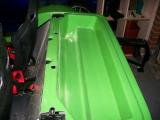
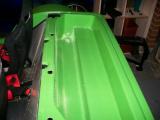
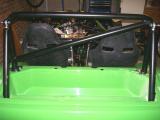
The main bodywork section has a square tab which sits on top of the standard roll bar mounting points, but the RAC bar bolts directly onto the supports, so we cut the tabs off. The boot box requires cutting into as the support bars for the roll bar pass through it, so it's just a case of trial and error with the marking and cutting.
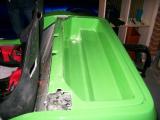
Before this could be done, Matt has to cut some holes into the boot box so that the top harness eye bolts could sit into place. He measured where these needed to go and then cut them with a hole saw. They were almost perfect first time and the harness bolts sit really nicely in place. We'll need to get some grommets for the spacers to tidy up the holes eventually though.
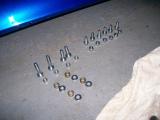
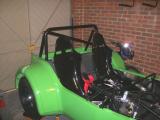
Now we bolted the roll bar into place. You get a giant bag of nuts, bolts, and washers, and you need to use the 6 shortest Allen head bolts, 6 washers, and 6 nylock nuts to secure the main section of the roll bar into place. One of the bolts is difficult to get into place as the cross bar is very close to it, so we used an Allen key bit and a spanner - a rachet was far too tall.
Now we held the support bars into place and marked where the bars touched the bodywork as these sections needed to be cut slightly. They don't need to be too neat though as the boot box will cover them.
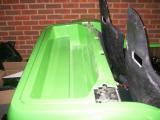
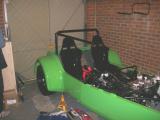
Now for the hardest bit - cutting the holes into the boot box itself. This is really difficult as you have to cut through corners at an angle. We fitted the bars into place, made some marks and measurements of where the bars started and finished, and translated these marks into the boot box which described a line to cut. Matt did very well with the hacksaw. The lines are not that neat and will definitely need smoothing and finishing, but I was very impressed overall. He stuck with it well, and the roll cage looks awesome!
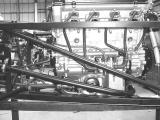
Whilst all this was going on, I was sorting out all of the coolant hoses. Westfield supply some hard pipes, and some rubber hoses too, and I had to get some images sent to help me out. All of the images I took have come out really dark. I have lightened them in Photoshop so hopefully they will be clear enough.
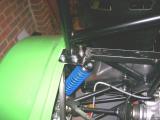
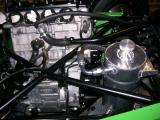
The two rubber hoses have a bulge at one end and and reduce down. The bulges fit on the radiator connections and then onto the solid pipes. You cut these pipes to length and then use the other half on the opposite end of each of the solid pipes to connect to the engine.
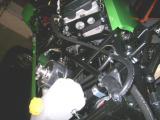
The top radiator connection goes to the slightly angled hard pipe, and then connects to the thermostat. The bottom connection goes into the 90 degree hard-pipe, which then curves right round the back of the engine near where your fuel pipes terminate on the passenger bulkhead. From here you use the rest of the rubber hose which you cut and connect it to the engine (very near the water pump). I couldn't get any pictures of this, but Westfield have some which I attached.
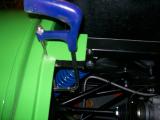
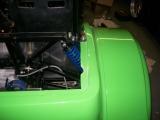
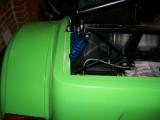
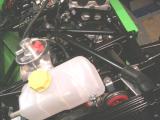
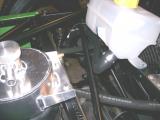
There is also a lot of plumbing to do with the header tank. The large outlet which points to the oil tank connects to the lower hard pipe using the supplied rubber pipe. If they seem tight, stick them in boiling water to make them a lot more flexible and they fit really easily. You need to cut this pipe to length and then push it over the stub on the lower pipe (pictured).
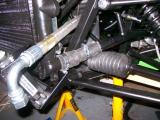
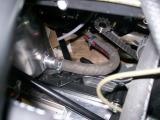
There is a final outlet on the header tank which points to the offside front wheel. You need to cut some rubber pipe (I used fuel hose which is what was used in Westfield's pictures). This pipe goes from the outlet to a T-piece. This T-piece then needs 2 further pipes coming off it. The first connects to the top of the thermostat (just above where the first hard pipe finishes). The last t-piece connection goes to the very small outlet from the radiator. There are pictures to show all of this.
Now with this done, I turned my attention to the oil pipes. The oil cooler pipes are very easy to fit - one goes to the oil tank return, and the other goes to the scavenge pump. The last pipe is one you must cut to length and it connects the oil tank outlet to the engine sump. That's most of the plumbing done. I'll cable tie it all up tight when the engine has been started and we're happy it's all as it should be.
Laurence
 |
 |
 |
 |
 |
 |
 |
 |
 |
 |
 |
 |
 |
 |
 |
 |
 |
 |
 |
 |
 |
 |
 |
 |