Westfield Megabusa Build Diary
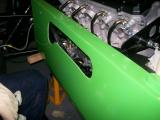
You know when you put off a job for as long as possible, and keep trying to find other things to do? Well eventually you run out of other things to do, and you have to tackle the job you were putting off. In this case, it was cutting a hole in the main body panel for the exhaust manifold to pass though. GULP!
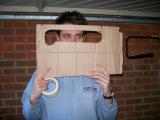
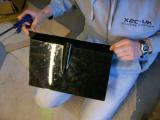
So how do you tackle it? You get your friend Kriss round, who is good at things like this. We looked at it for a while, and Kriss decided that the best thing to do was to make a cardboard mock-up. He marked up a rough shape in the cardboard using a ruler and a compass so we had straight edges and perfect curves, and then adjusted his template a couple of times. Eventually we were left with a nice shape (pictured) which we transferred to the body using masking tape.
We decided that the best way to cut the hole was using a jigsaw with a very thin blade to make the curves easy to cut, and I was nominated to do the cutting since I was the only one who had really used it before. I was really worried about it, but once we got started the jigsaw really made it easy. The jigsaw works best on higher speeds against the body plastic since it is much less likely to "catch" and damage the body.
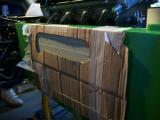
We stopped to examine the cut after the first line and it was almost perfectly straight. I tackled the first curve and again, the jigsaw took it really well. After just a couple of minutes we had a really nice shaped hole. We dusted off and had a trial fit.
The left side of the cut needed enlarging a little as it was too close, so we drew a couple more cutting lines and started with the jigsaw again. The 2nd cut was perfect and the manifold went in really nicely, leaving enough clearance around the manifold, but not so much that it looks untidy.
We were all very happy with the work, and Kriss' template made it very, very easy. We decided to remove the manifold now until the body was fixed into position.
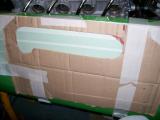
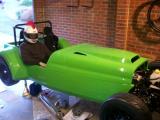
With this done we thought we would have a trial fit of the other body panels. The removable scuttle panel will need some cutting in order to fit nicely. Kriss had a quick look at this, and then left it to Matt to finish. Also, the scuttle itself will need some cutting as it fouls the steering column, and also the wiring loom grommets. This doesn't take long though.
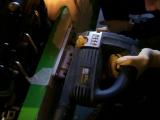
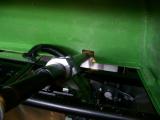
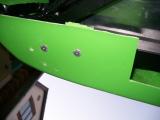
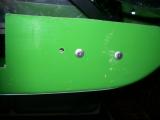
Now for the body fixing. The rear of the bodywork needed fixing into place, and it is done using 2 large rivets each side. The rear of the car looked wonky though, and no amount of moving it would help. Eventually we realised that if both sides were riveted then it would have to sit straight...hopefully!
Out came the drill and we fixed each side down. The rivets move the rear of the body up about an inch, and this sorts out the alignment perfectly. The rear now sits perfectly straight.
The next thing we'll have to do is fix the other body panels into place, but there will be a lit of measuring and checking, so it's probably best to make a fresh start on this, and besides, we're heading out for the evening, so we get cleaned up and out comes the beer. Well done guys.
Laurence
 |
 |
 |
 |
 |
 |
 |
 |
 |
 |