Westfield Megabusa Build Diary
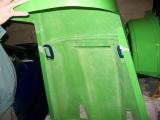
We left the panels fitted into place, but not fixed down with the exception of the rear section. Before we could fix any more of the body down, the other body sections must be fitted into place and fixed one by one, re-checking alignment at every stage.
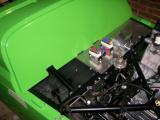
This involves lots of marking. There are several rivnuts already inserted into the chassis, and you must transfer each of their positions onto the body panels, and then drill them. Accuracy is important here as you don't want to make the holes too big!
The manual says there are 6 rivnuts for the scuttle and 2 for the nose cone, but there are in fact only 4 for the scuttle.
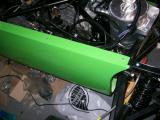
I marked in several places on the body using marking tape and a pen, and then removed everything except the scuttle. I then drilled 3 holes per side on the bodywork and then riveted the top of the main bodywork section into the top chassis rail along the engine bay area. The rivets are very long and each take 2 goes with the riveter.
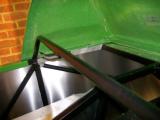
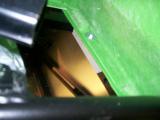
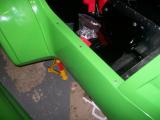
Now the scuttle can be fixed down with the holes I had drilled, and bolted down into the rivnuts in the chassis using some large washers. Before it would fit neatly I had to make a couple of modifications to the scuttle. We previously cut a hole to allow the steering column to pass through, but the two wiring loom grommets were also causing problems, so out came the jigsaw.
The holes are very difficult to cut as the cuts need to be made right on the edge of the angle, but I managed it. I'll neaten them up later as the scuttle is easily removed.
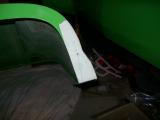
Now the main body section between the scuttle and the rear arches could be secured down, again, using 3 rivets per side. I quick check with the tape measure that everything still lines up, so I move onto the bonnet and nose cone.
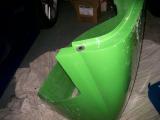
The bonnet is actually secured into the nose cone using pegs which insert into the nose cone to stop the bonnet from lifting, but it still make it easily removable. In order to achieve this you have to drill holes in the hidden edges of both. The measurements must be spot on with both panels here - they must line up perfectly.
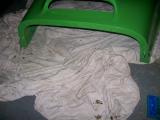
I marked and drilled the bonnet, then G-clamped the bonnet and nose cone together - adjusting a couple of times until I was completely happy with the alignment. This is a two person job, so my Dad helped. Matt was on Call Of Duty 4 and once he starts he doesn't stop, so I had written off the idea of help from him tonight!
There was enough room to drill through the nose cone using the bonnet as a template, so my holes lined up perfectly. With the panels separated I enlarged the bonnet hole as instructed, and then enlarged the nose cone hole to 19mm (I didn't have an 18mm cutter). 19mm turned out to be perfect for the grommet though - 18mm would have been to tight, so I got lucky. I then secured the pegs into the bonnet and gave them a trial fit.
All looks good, but the nose cone seems to flop forward as soon as you don't support it, which creates a big gap between the bonnet and nose cone. I wonder if this will get any better with both items secured down?
Laurence
 |
 |
 |
 |
 |
 |
 |
 |
 |
 |
 |