Westfield Megabusa Build Diary
Now that the car has already run and bar a few niggles, seems roughly ok, it's a good time to start the SVA preparation.
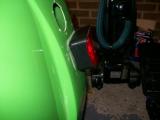
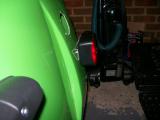
Number 1 on the list is the fog light angle. The fog light sits at a slight angle when flat to the bodywork, so I used the supplied plate from Westfield to make it sit square to the floor. This was very easy and just required the block connector to be dismantled so the cable could be run through the metal bracket. It looks terrible, but the light sits square and should be fine with the SVA examiner.
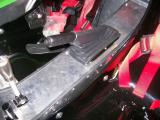
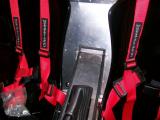
Next job was to the fit the handbrake cover as this is another requirement. There was a rubber matt which we couldn't work out as it made the whole assembly too much for a screw of rivet to go through, so we just left it out. Also, we used screws and not rivets since I'd like to be able to remove it if needed without awkward drilling.
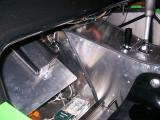
There are a lot of sharp edges in the cabin, so I covered everything I could with rubber u-channel. I got Westfield to send me loads and loads more as I wanted to go around everything, and still have enough spare to take to the SVA for last minute patching if needed.
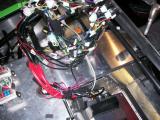
The entire transmission tunnel panel was covered, and so were the reverse box inspection panels and the ECU tray. It actually looks really nice. Super glue holds it really well, and bolting it down holds it even better, so I used both which helped with positioning.
Lastly, I still wasn't happy with the aero-screen as it was too close to your hands when placed on the steering wheel. Your knuckles came into contact with the screen, and this is not a good idea. The screen needs to come up at a steeper angle.
I decided to fibreglass the holes up in the scuttle and start again. This time I made a much better job and the screen sits at a much better angle.
Laurence
 |
 |
 |
 |
 |
 |
 |