Westfield Megabusa Build Diary
Over the last new days I have spent the odd hour here and there putting the finishing touches on the car. The main focus was the SVA preparation though.
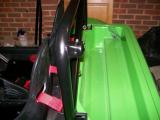
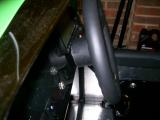
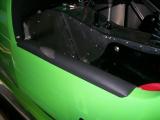
It seems that there are no right or wrong answers with the SVA trimming. Just make sure all of the sharp edges are covered. Westfield ended up sending around 4 times as much rubber trim as they did originally since we had to go around the seats, up the transmission tunnel, around the nosecone, and along several other places just to be sure.
They also sent us a load more plastic nut and bolt covers. I wanted to make sure I covered everything, and have enough to take to the SVA for safety too. The same story for the rubber trim too.
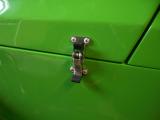
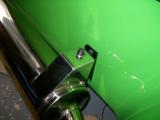
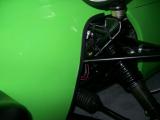
See pictures for the areas that were given attention, but in short they were:
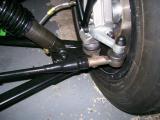
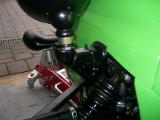
- Cover all exposed nuts and bolts inside cabin (ie. gear lever), and all wishbones and front end bolts.
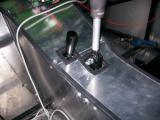
- Trim sharp edges of transmission tunnel.
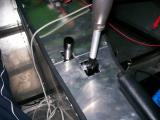
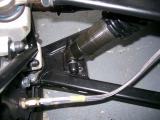
- Trim reverse box inspection panels.
- Trim holes cut for gear and reverse levers.
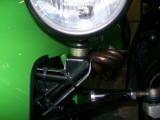
- Fit spacer for headlights to ensure no wheel contact on full lock.
- Fit headlight bracket covers.
- Fit kick strips and rear bulkhead/bootbox front cover trim plate.
- Space foglight so it's 90deg from floor.
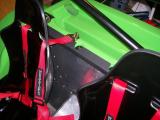
- Cover rollbar brackets (decided not to fit rollbar supports until after SVA for easy boot box access).
- Fit steering wheel boss cover.
I'm sure there were some other bits too, but my suggestion is this - if you think it might need to be covered then cover it!
The car seems totally ready for its SVA now. I had to raise the front suspension up a little bit to ensure the indicators were above the minimum height from the road. The only other problem was self centering of the steering, so Matt and I popped up and down our road quickly. This is not strictly legal, but at very low speeds in a dead-end private road is not quite the same as popping down to Tesco in an uninsured car. I know the law is the law, and where do you draw the line to what you should and shouldn't do etc...
Anyway, there is no self centering at all, and the R888's don't help as they are so sticky. I added some extra toe-out and altered the tyre pressures and it at least attempts to self-centre now. Hopefully Mr SVA man will be ok. We might have to make some alterations on the day.
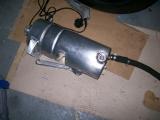
After we had been up the road and back a couple of times, the oil obviously gets thinner and it was leaking from the bottom of the dry sump tank. Only very slightly, but it's obvious it shouldn't do it. It looks like a very similar problem to the fuel tank boss leak. I removed the oil tank it to check what's wrong.
Also the last pic was a storm on its way over and it turned the sky an awesome colour, so I pictured it.
Laurence
 |
 |
 |
 |
 |
 |
 |
 |
 |
 |
 |
 |
 |
 |
 |
 |