Westfield Megabusa Build Diary
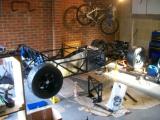
This is the milestone that any car builder looks forward to. The day the engine goes in is the day that the rolling chassis becomes a car, and the light at the end of the tunnel becomes visible.
It's around noon, Kriss and Jonny have just arrived, and the engine is fully prepared ready for fitting. We walk around for a bit weighing up the best way to go about it, and decide to move the engine and pallet over to the offside next to the engine bay. Kriss then suggested that we cover the top chassis rail so it didn't get scratched by the engine, so some packing card was taped over it.
The engine can be lifted quite comfortably by two people, but due to the chassis still being quite high on axle stands, there were 4 of us. Kriss and Jonny and I lifted the engine up to about chest height, but we couldn't get it into the engine bay as we were all in each others way.
Jonny was already looking at numbers for engine crane hire, but I knew it would go in manually. The problem was getting the engine into the engine bay, so I suggested that Matt should stand inside the engine bay so Kriss and Jonny could pass it to him to support, then he could pass it to me to support and duck out, leaving the 3 of us to lower it down.
In the end Matt just put one leg into the engine bay and one outside. Jonny and Kriss lifted the engine to around chest height, passed it towards Matt so the 3 of them supported it, then he slipped his leg out whilst I supported part of the engine frame. Now we just lowered it down into position.
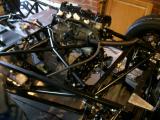
Problem! It won't sit on its mounts. If it sits correctly on one side, the other side was about an inch too low. We tried a few things, but nothing would line up. Jonny took a look at the manual and quickly worked out that the engine frame was fixed on the wrong side of the engine brackets at either end (see previous post here for more details).
So back out the engine came, and we quickly swapped the frame to sit the other side of the brackets. We had to remove the whole thing, but it didn't take long. We lifted the engine back in using the exact same technique as before, but this time it sat on its mounting locations perfectly.
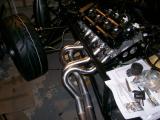
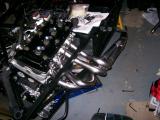
The engine was finally in - well nearly. It's not bolted down, but you can't bolt it down until you have the bodywork in place. The trick is to fit the bodywork, and then the exhaust. When the exhaust lines up with the bodywork for mounting, you can drill your holes in the engine mounting brackets and then bolt it down.
I think that this went fairly well, except the pictures. I let Matt take them and they are all blurry (again). Sorry!
Laurence
 |
 |
 |
 |
 |